Triple booting mac, windows, and arch linux
A couple of weeks ago I decided to try out arch linux as a virtual machine. I didn’t really have a good understanding of what arch is or why anyone would want to use it, so I though I might learn something. I ended up learning a lot more than I set out to. It turns out that installing arch can be quite the undertaking including manual partition creation, partition formatting, chrooting, installing a kernel and bootloader, etc. Once you’ve done all that arch is installed, but you still need to set up X server, a display manager and a window manager if you want them. I have been interested in tiling window managers for some time but have only been able to get dwm installed on my mac which has made me interested to get back into linux. I’ve heard of some others that I haven’t tried. I tried out a couple and decided on awesome wm. It took me some time to wrap my head around X, display managers, awesome, and urxvt, but I never felt like I really understood tty’s, Xorg, or graphical desktop environments until I had to install and configure them myself. It gave me a look into the underworkings of my computer, and I started to grasp how it all came together.
I have also been watching some of the wonderful code school videos by Brian Will that have helped me better understand process management and memory allocation. When you start to dissect a computer and begin to see exactly how it all comes together you see at once how it’s done and how it could be done differently. It’s not something I’d recommend for anyone who isn’t fascinated by learning about computers, but for those who are it’s really a refreshing experience to feel like you somewhat grasp how exactly the window I’m typing into works. I appreciated that I could run a minimal, fast operating system where I felt like I could come to grasp what each process did and how to effectively manage and secure my machine. I realized that I was still worlds away from this level of understanding with macs and that macs are quickly rising on the target list for black hat hackers.
All of that being said, I think the most fundamental reason why arch drew me in was pacman, its package manager. It’s simple, it’s fast, and it has current, stable packages. Arch also makes it easy to integrate with a community to get other packages you might want. Trying to be a command-line junkie on OSX is just asking for frustration. Homebrew has to compile everything from scratch, it doesn’t contain all the packages you want, and trying to compile that package yourself is almost guaranteed to be a pain on OSX. I feel like I’ve learned a lot about compiling from having to go through that so many times, but compiling on linux is such a breeze in comparison and rarely needs to be done. Plus, those applications you wanted to use that don’t display well in aqua are easily remedied. Far and above the desire for a package manager like that on a quick and simplistic system is what made me start salivating over arch.
I considered selling my mac since I assumed installing linux on mac was out of the question. I knew it was probably technically possible, but I had enough trouble trying to just install arch. I didn’t think myself smart enough for that kind of endeavor. It turns out that arch has one of the most extensive and well-maintained wikis of any distro. Their wiki pages have to be extensive to explain all the various topics you might run into while handling an operating system at that level, which means in large part they cover topics that aren’t at all specific to arch. This lead me to this wiki page, which seemed to claim instructions on how to install arch on my macbook. If only I could understand what all these words mean…
In the end it turns out that everything I needed was on that page; I just didn’t understand it. It’s like someone teaching you how to speak Spanish by speaking Spanish. The crazy thing is that that is actually a good idea. After looking up enough topics and wrapping my head around what this page says I finally was able to triple boot OSX Snow Leopard, arch, and Windows 7 on my 8,1 MacBook Pro. I’ll try to explain how I did it in my own words:
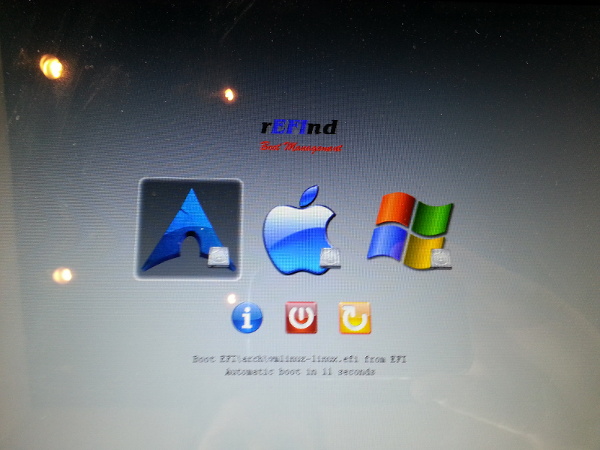
I had a Windows 7 Bootcamp partition long before I ever attempted this, so I won’t go into how to set that up. There’s basically a Bootcamp setup assistant application in /Applications/Utilities that does everything for you. To get arch running, I first installed rEFInd, which was incredibly easy. It has an installation script that does everything for you. I didn’t have to “bless” it or do any of the extra steps on the arch wiki page. After the script finishes you should be able to restart your computer and see the rEFInd boot manager screen with OSX and your Windows Bootcamp partition showing. Apple uses something called UEFI instead of a standard BIOS found in most computers. For people familiar with BIOS it may seem like EFI is adding an unnecessary layer of complexity, but it actually has many advantages to BIOS. For example, it uses something called the GUID Partition Table (GPT) instead of the master boot record (MBR) which is much more flexible. You may recall that MBR cares a lot about the partition order and installation order. GPT has no such constraint, which works in our favor here.
Now that I had rEFInd running, I booted into OSX and made some free space using the Disk Utility application. I also used it to burn a current copy of the arch linux ISO onto a CD. You can boot from a CD on macs by holding down “c” as you power on the machine. That got me into an arch linux live shell. Here I tried to partition with cfdisk but it conveniently gave me an error notifying me that cfdisk doesn’t work with GPT. I found out that cgdisk does; however, which worked like a charm. According to some of the guides, Apple likes a 128M buffer between its partition, so I left 128M of free space in front and then made a 512M boot partition, a 10G swap partition (I usually do a little more than my RAM which in this case was 8G), and filled the remaining space with a root partition. You then have to format the swap partition with mkswap and turn it on with swapon. You’ll also need to format the boot and root partitions. I just used mkfs.ext4 on both. Then you can mount the root and boot partition with
mount /dev/sd(whatever root is) /mnt
mount /dev/sd(whatever boot is) /mnt/boot
At this point you’re supposed to get an internet connection going, but I soon found out that the MacBook Pro 8,1 in particular had trouble with linux wireless drivers. I saw many a remedy to this, but the solution turned out to be quite simple. I plugged my computer into ethernet and connected it with dhcpcd. I installed the base system with pacstrap /mnt base, but I would recommend doing pacstrap /mnt base base-devel instead. The base-devel package just includes necessary packages for compiling software, which I’m almost sure you’ll need at some point if you’re using arch. You should then generate an fstab with genfstab -p /mnt >> /mnt/etc/fstab. Then you can arch-chroot /mnt to chroot into your mounted environment and pacman -Syu to update the system.
# Set your locatime by
ln -s /usr/share/zoneinfo/Your/Time /etc/localtime
# Uncomment your locale in /etc/locale.gen and generate the locale
locale-gen
# Set a root password
passwd
# Create the initial RAM disk with
mkinitcpio -p linux
For wireless, I saw the b43-firmware package in the AUR and tried to install it, but didn’t have success. Now I’m almost sure the reason for that was because I hadn’t installed base-devel. If you do you should be able to download that package and use makepkg -s and then pacman -U *.pkg.tar.xz inside its directory to install what you need (edit: I’ve since done this and it works and is preferable). If you didn’t install base-devel then you can do it the way I did, which was to use curl to manually type in the broadcom driver url, untar it with tar xf broadcom*, cd into the linux directory inside of it, and then use b43-fwcutter wl_apsta.o. Finally, you need to rmmod b43 bcma and modprobe b43 to instantiate the appropriate module. This got my wireless up and running. I installed grub2 with
pacman -S grub-efi-x86_64
grub-install /dev/sd(wherever boot is) --directory=/usr/lib/grub/x86_64
Your next step is to make an “EFISTUB”, which just means an entry on the EFI boot manager menu. To do this, you need to mount the partition that the EFI boot manager is on. For me, rEFInd installed this at /dev/sda1, so I mounted it at /boot/efi, move into the /boot/efi/EFI directory and created a directory called arch. Copy some files there:
cp /boot/vmlinuz-linux /boot/efi/EFI/arch/vmlinuz-arch.efi
cp /boot/initramfs-linux.img /boot/efi/EFI/arch/initramfs-arch.img
cp /boot/initramfs-linux-fallback.img /boot/efi/EFI/arch/initramfs-arch-fallback.img`
Later on you can make a systemd task do this for you automatically each time the kernel is updated. Finally, I made a configuration file called /boot/efi/EFI/arch/refind_linux.efi with one line:
root=/dev/sd(wherever root is) ro rootfstype=ext4 add_efi_memmap initrd=\EFI\arch\initramfs-arch.img i915.i915_enable_rc6=1 i915.i915_enable_fbc=1 i915.lvds_downclock=1 usbcore.autosuspend=1 h
After that you should be able to exit, umount your efi, boot, and root mounts, then reboot. Hopefully it works! Let me know if I missed a step or if you got stuck somewhere. I may have forgotten something while typing this up. Good luck!